DIY Rabbit Nest Box
Rabbit nest boxes are an essential item to have on hand if you plan on breeding and having litters. There are many different styles of “nest boxes” out there - metal, drop down, attached to the cage - but so far, my favorite remains the classic wood nest box.
My nest boxes are made out of 1x12 untreated pine fastened together with screws. The nest box floor is a piece of 1/4” hardware cloth, which allows urine to fall through as the babies grow, lessening the chance of damp bedding and bacterial infections. Using these plans, you can make a rabbit nest box for around $20. The project is beginner friendly - be sure to watch the accompanying video for a more in-depth look at the build!
What You’ll Need
Materials
1 - 1x12x6 untreated pine board
1/4” hardware cloth
1.5” screws
3/4” lath screws
Tools
Marker
Measuring tape
Carpenter’s square
Straight edge (I use my level)
Circular saw
Impact driver or screwdriver
Drill for making pilot holes
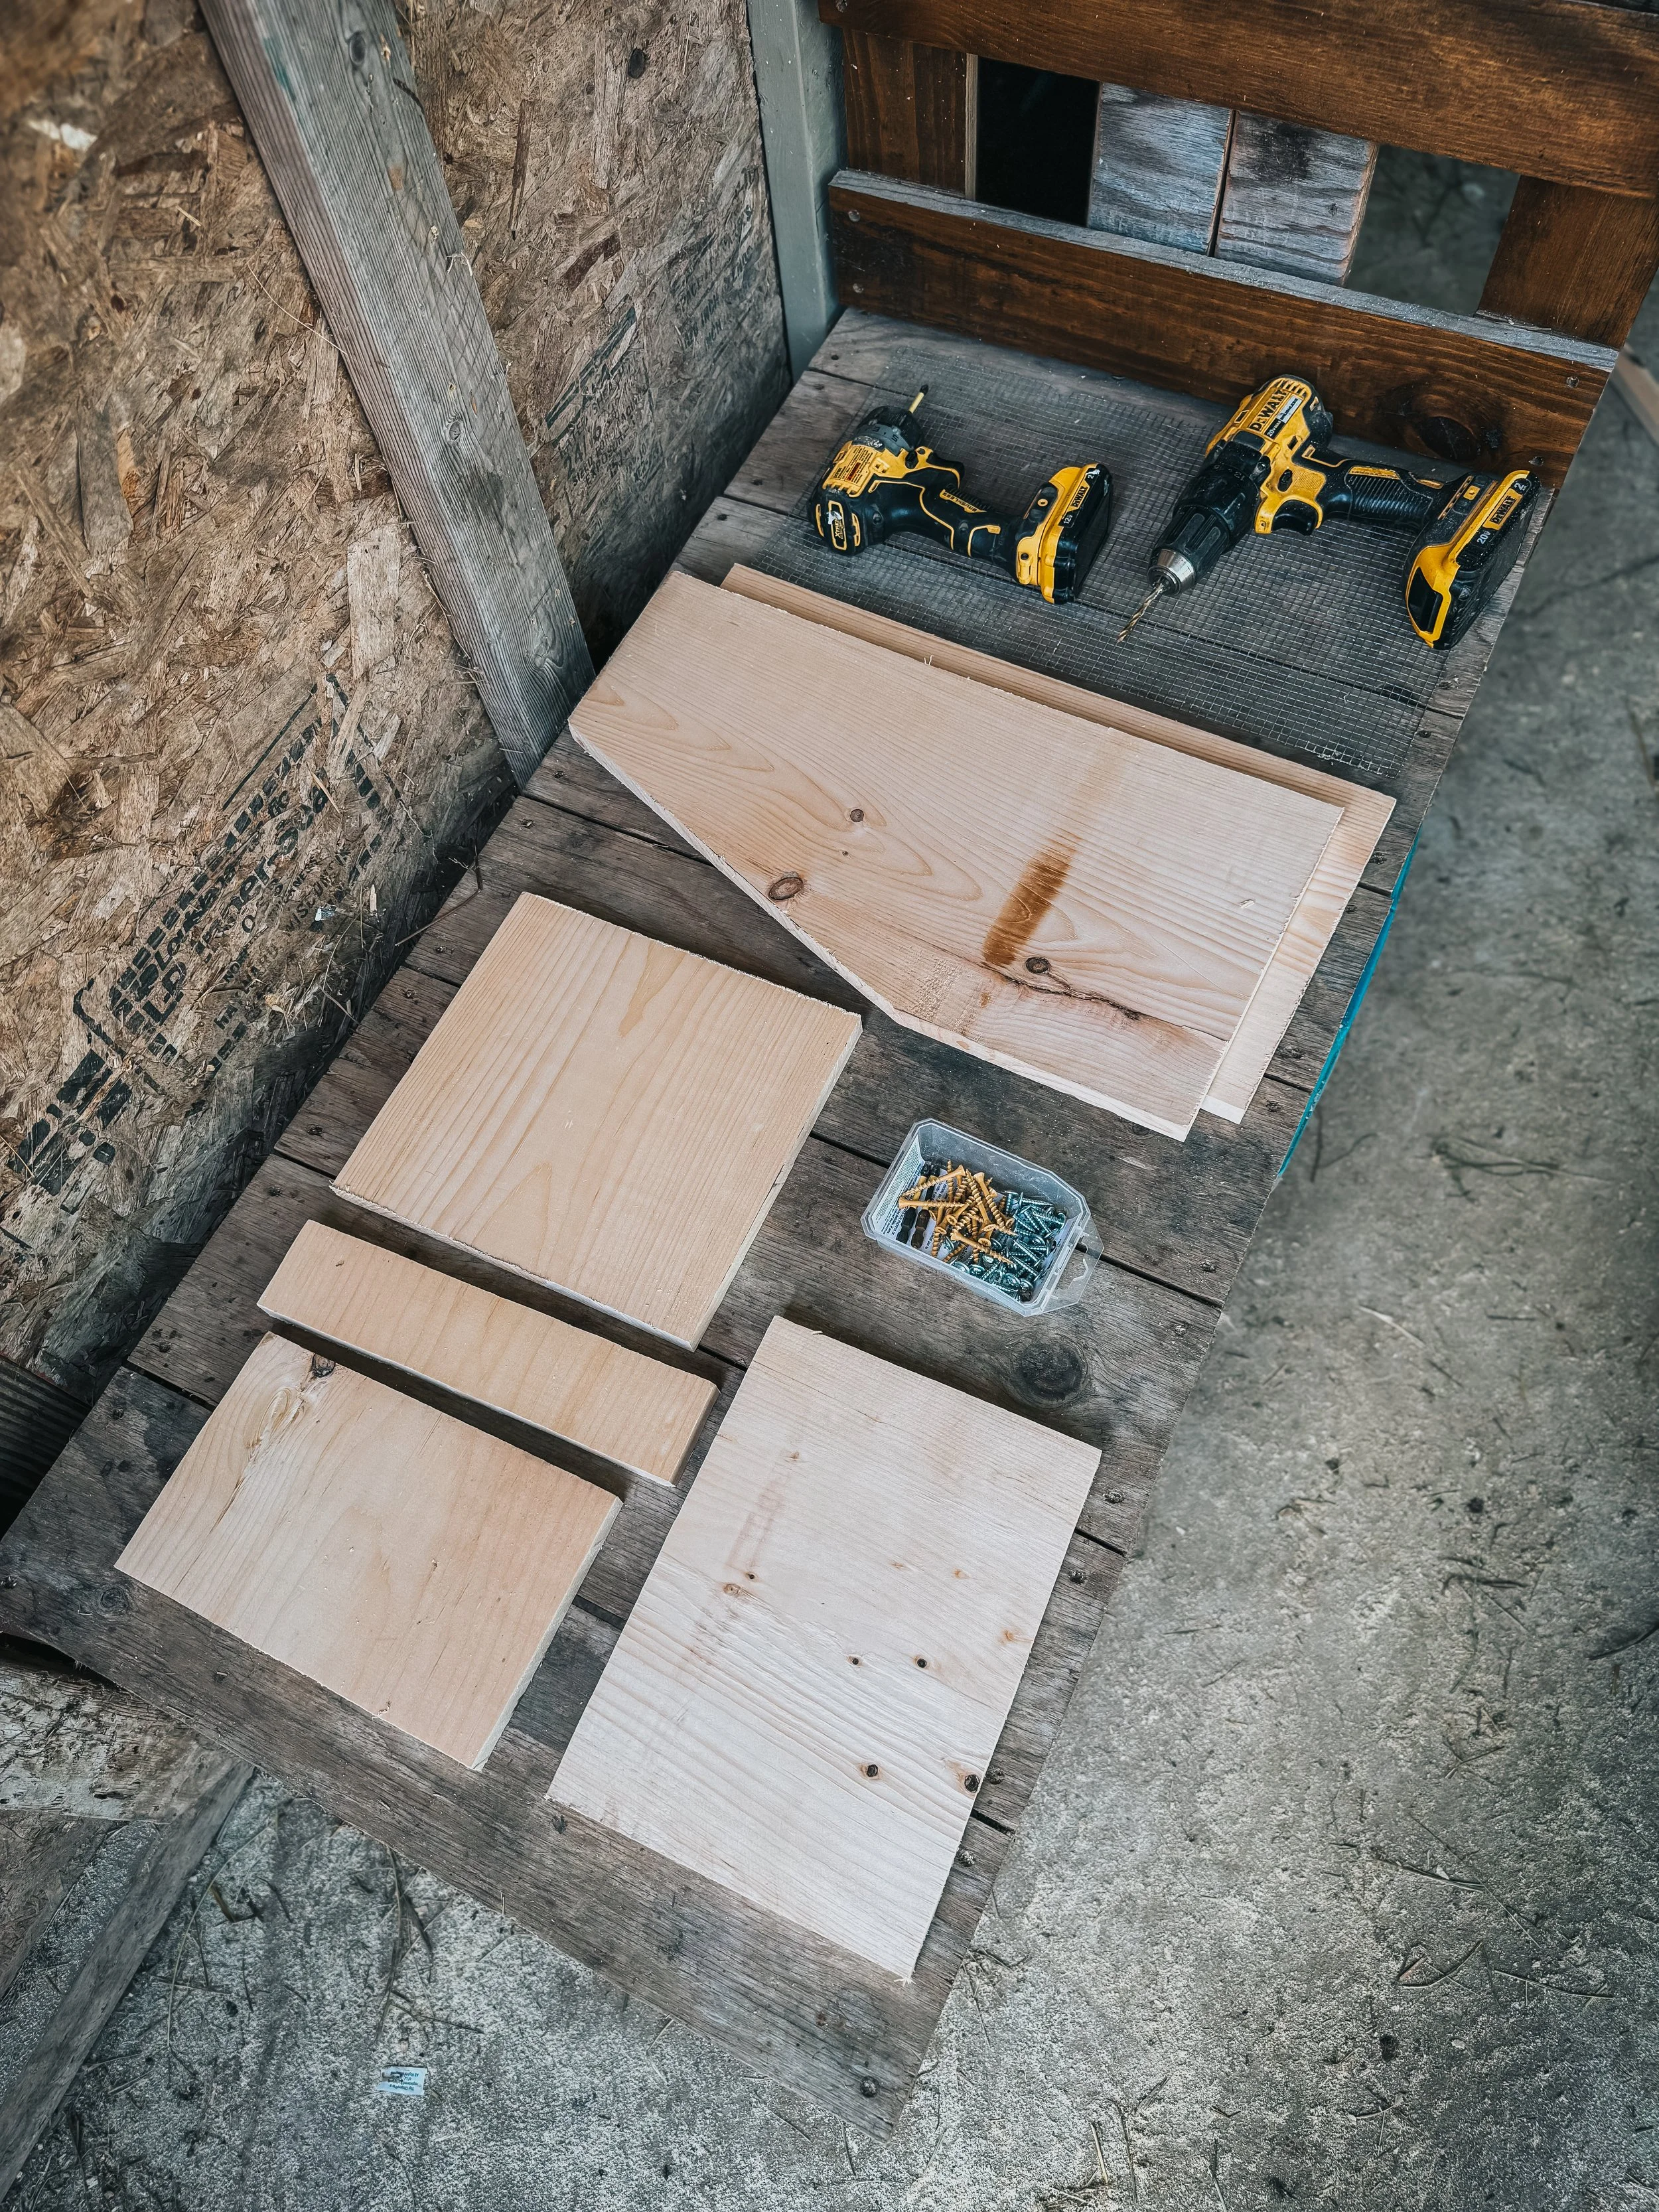
Make the Cuts
Here are all the pieces you will need, along with their dimensions. If you are unsure how to mark your angled cut, please refer to my video!
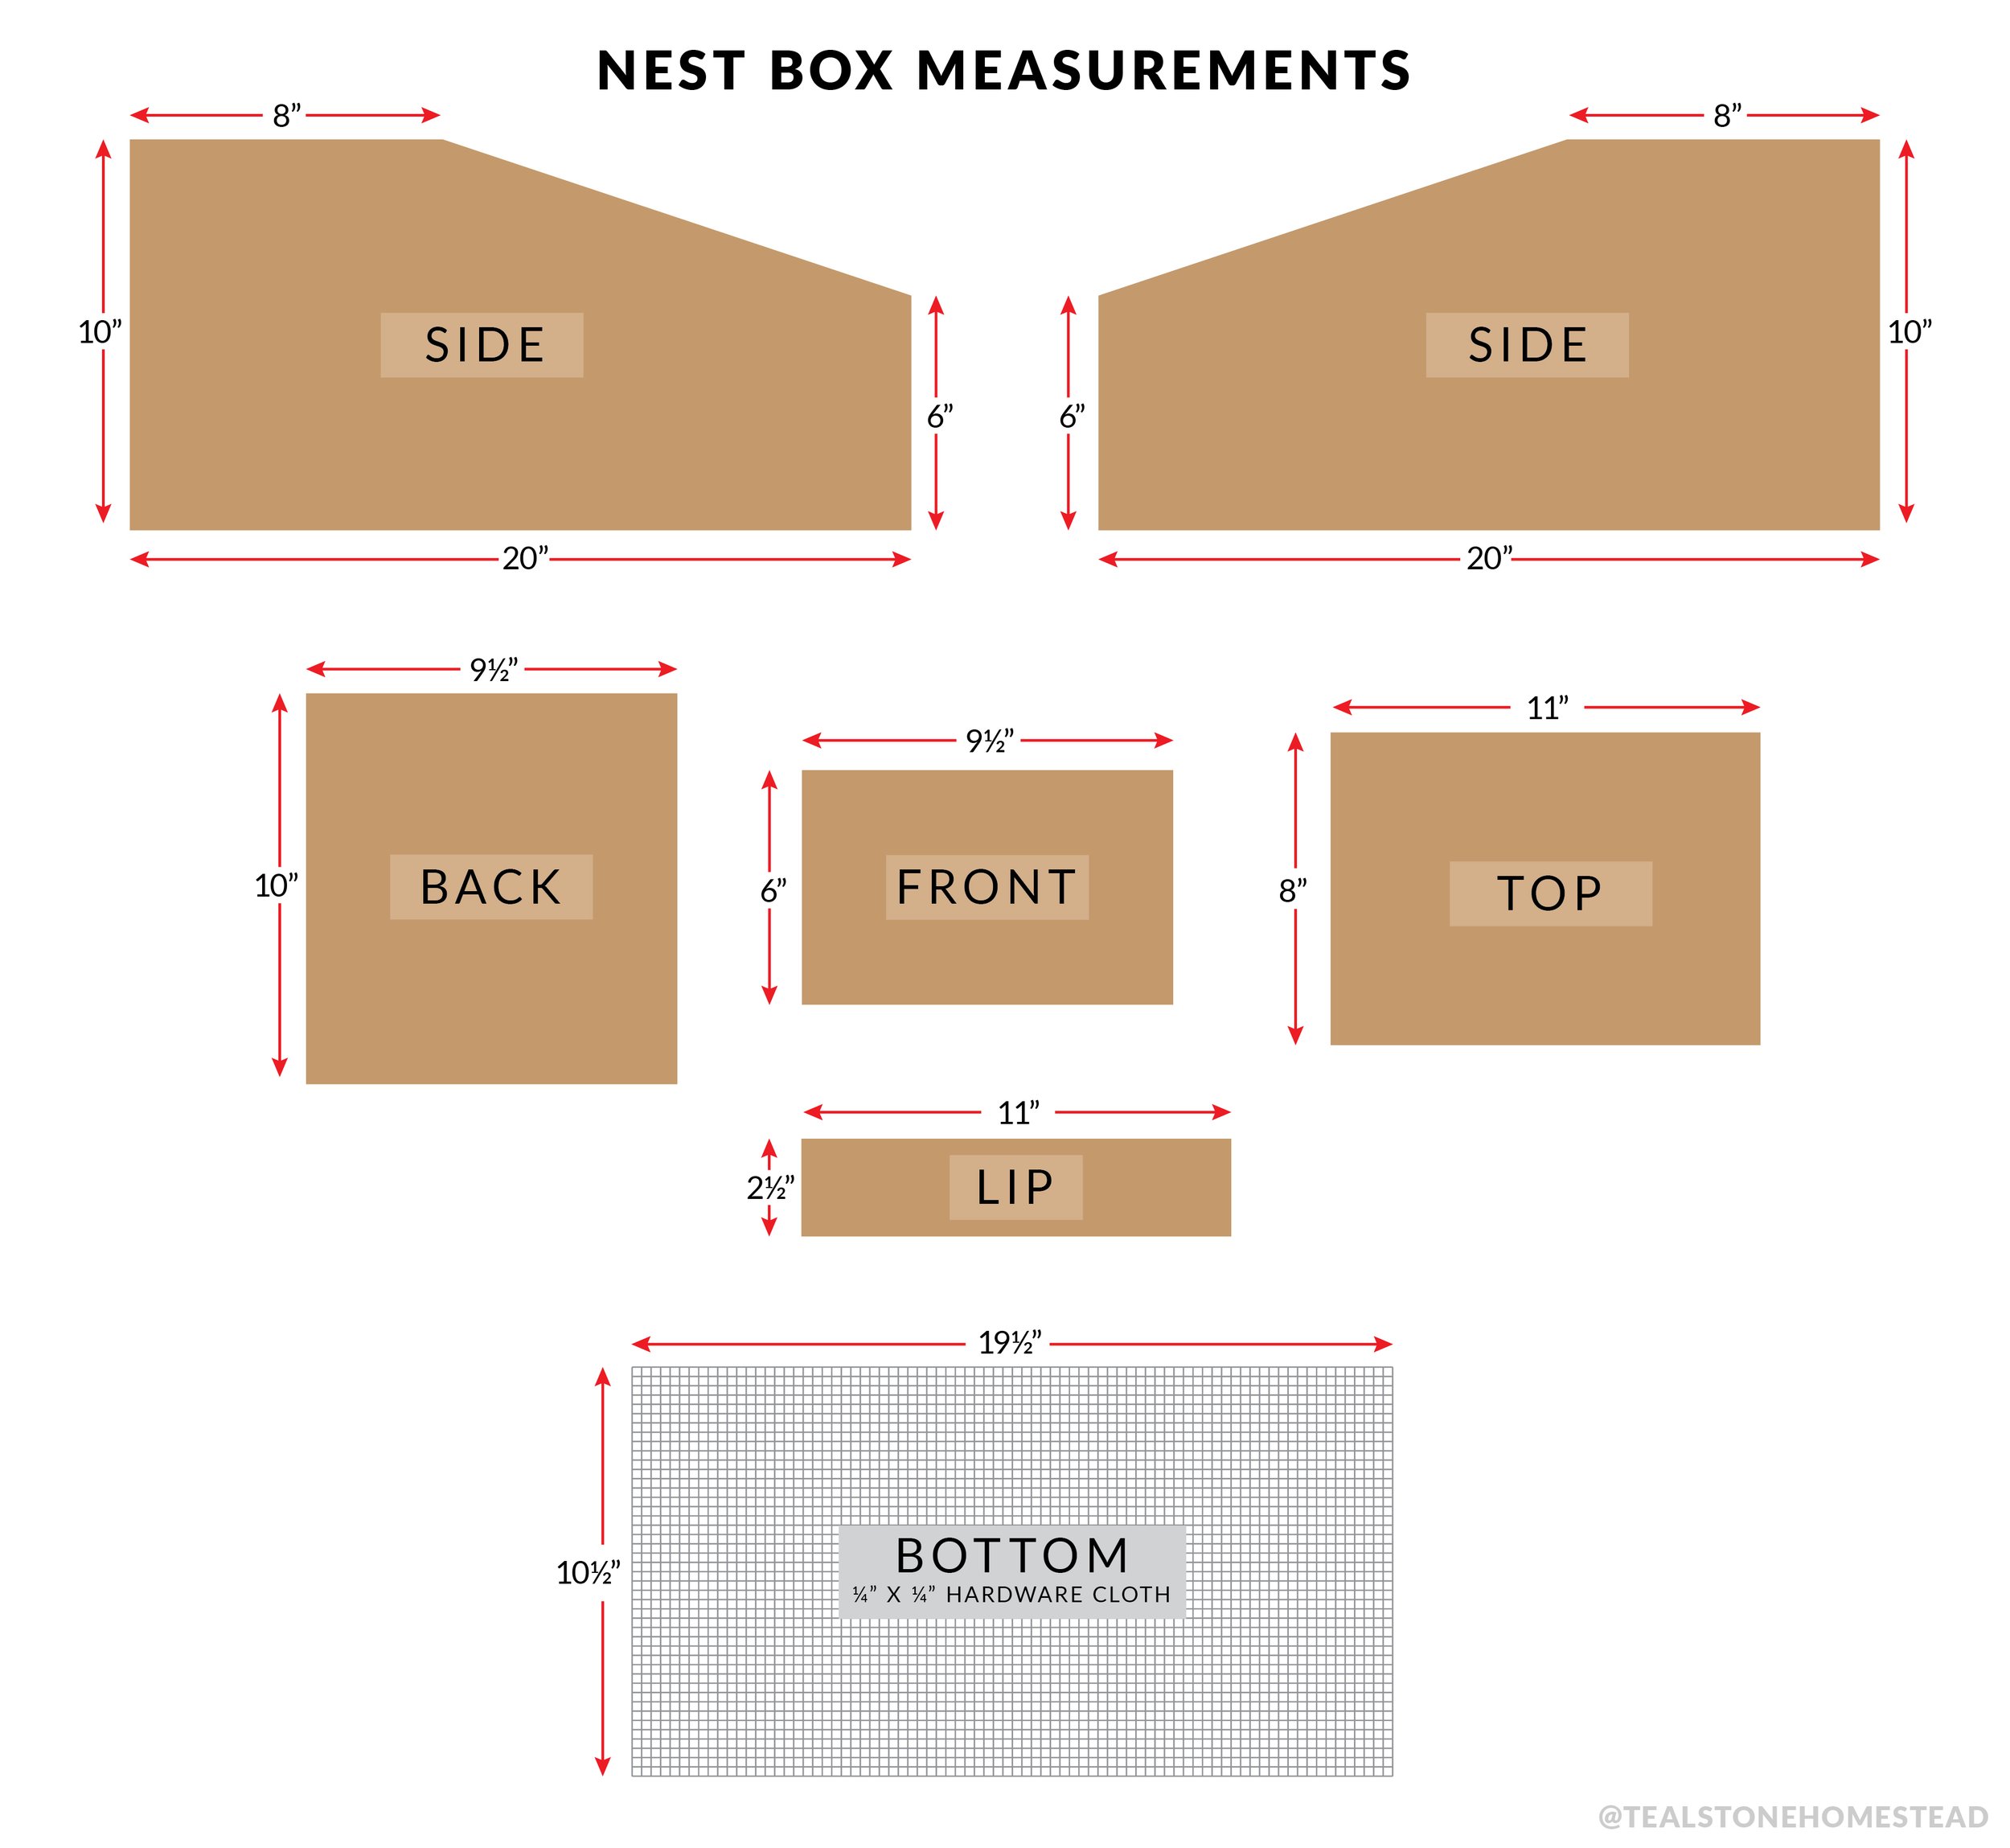
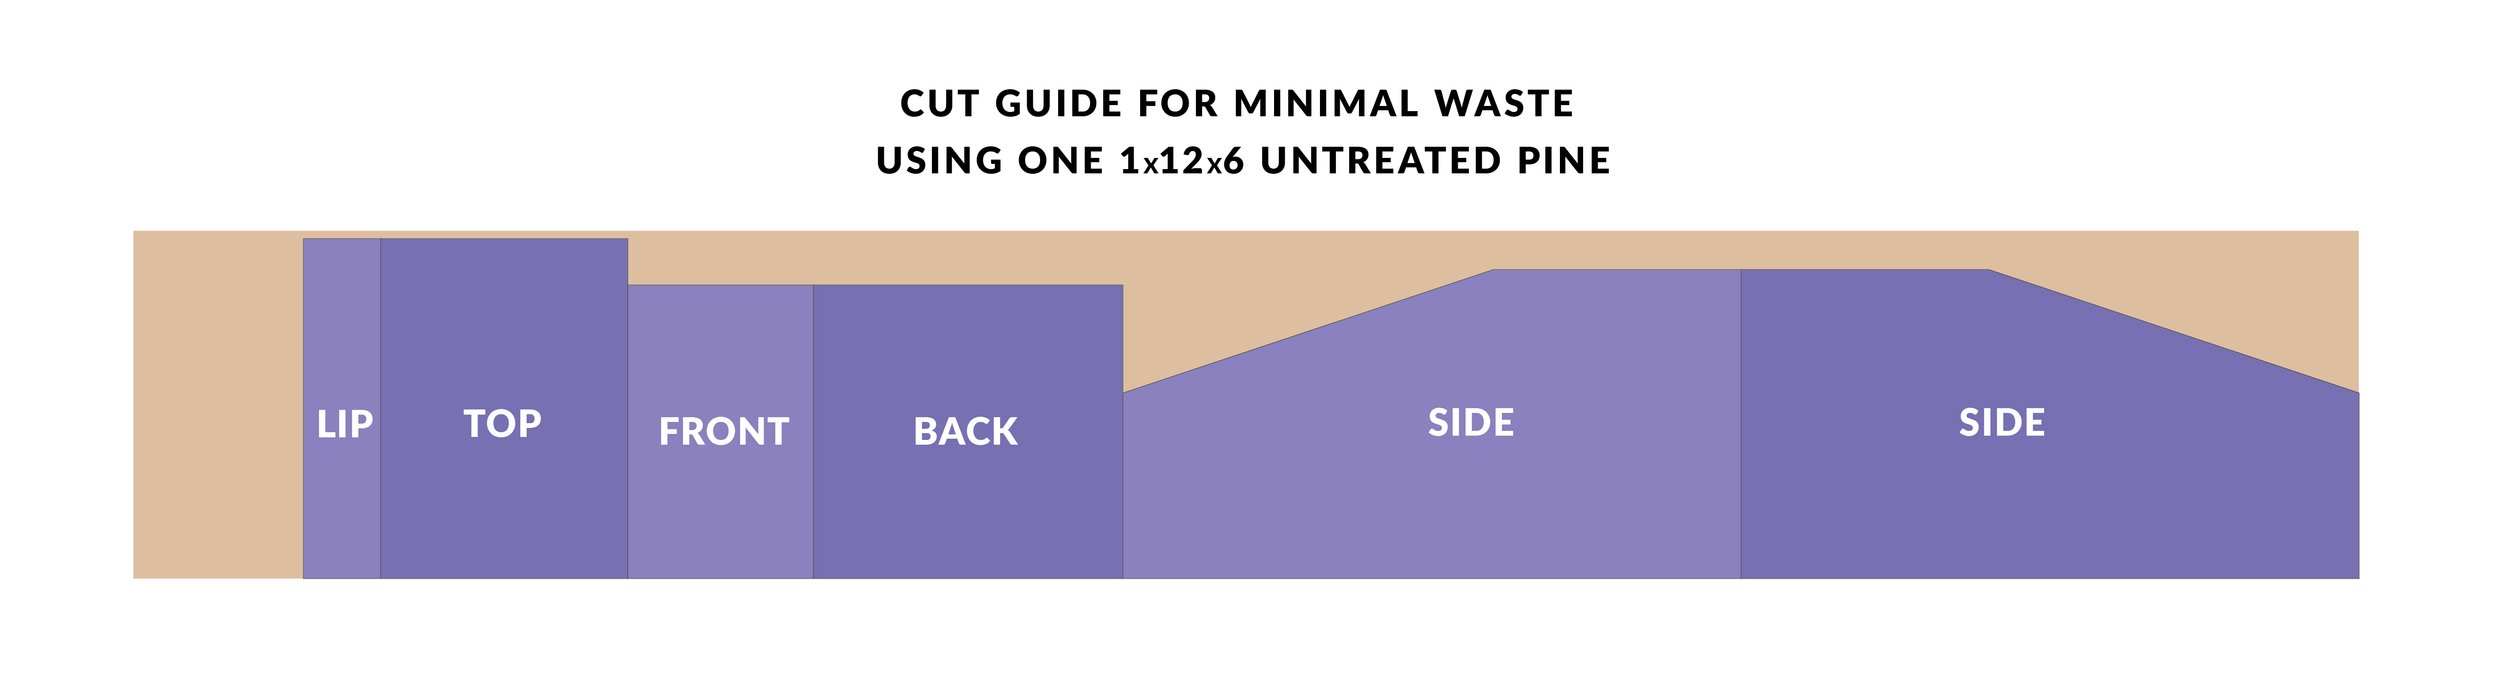
For money savings and minimal cutting and waste, I have provided a layout for you to cut your pieces out of a single piece of 1x12x6.
BuilD the Box
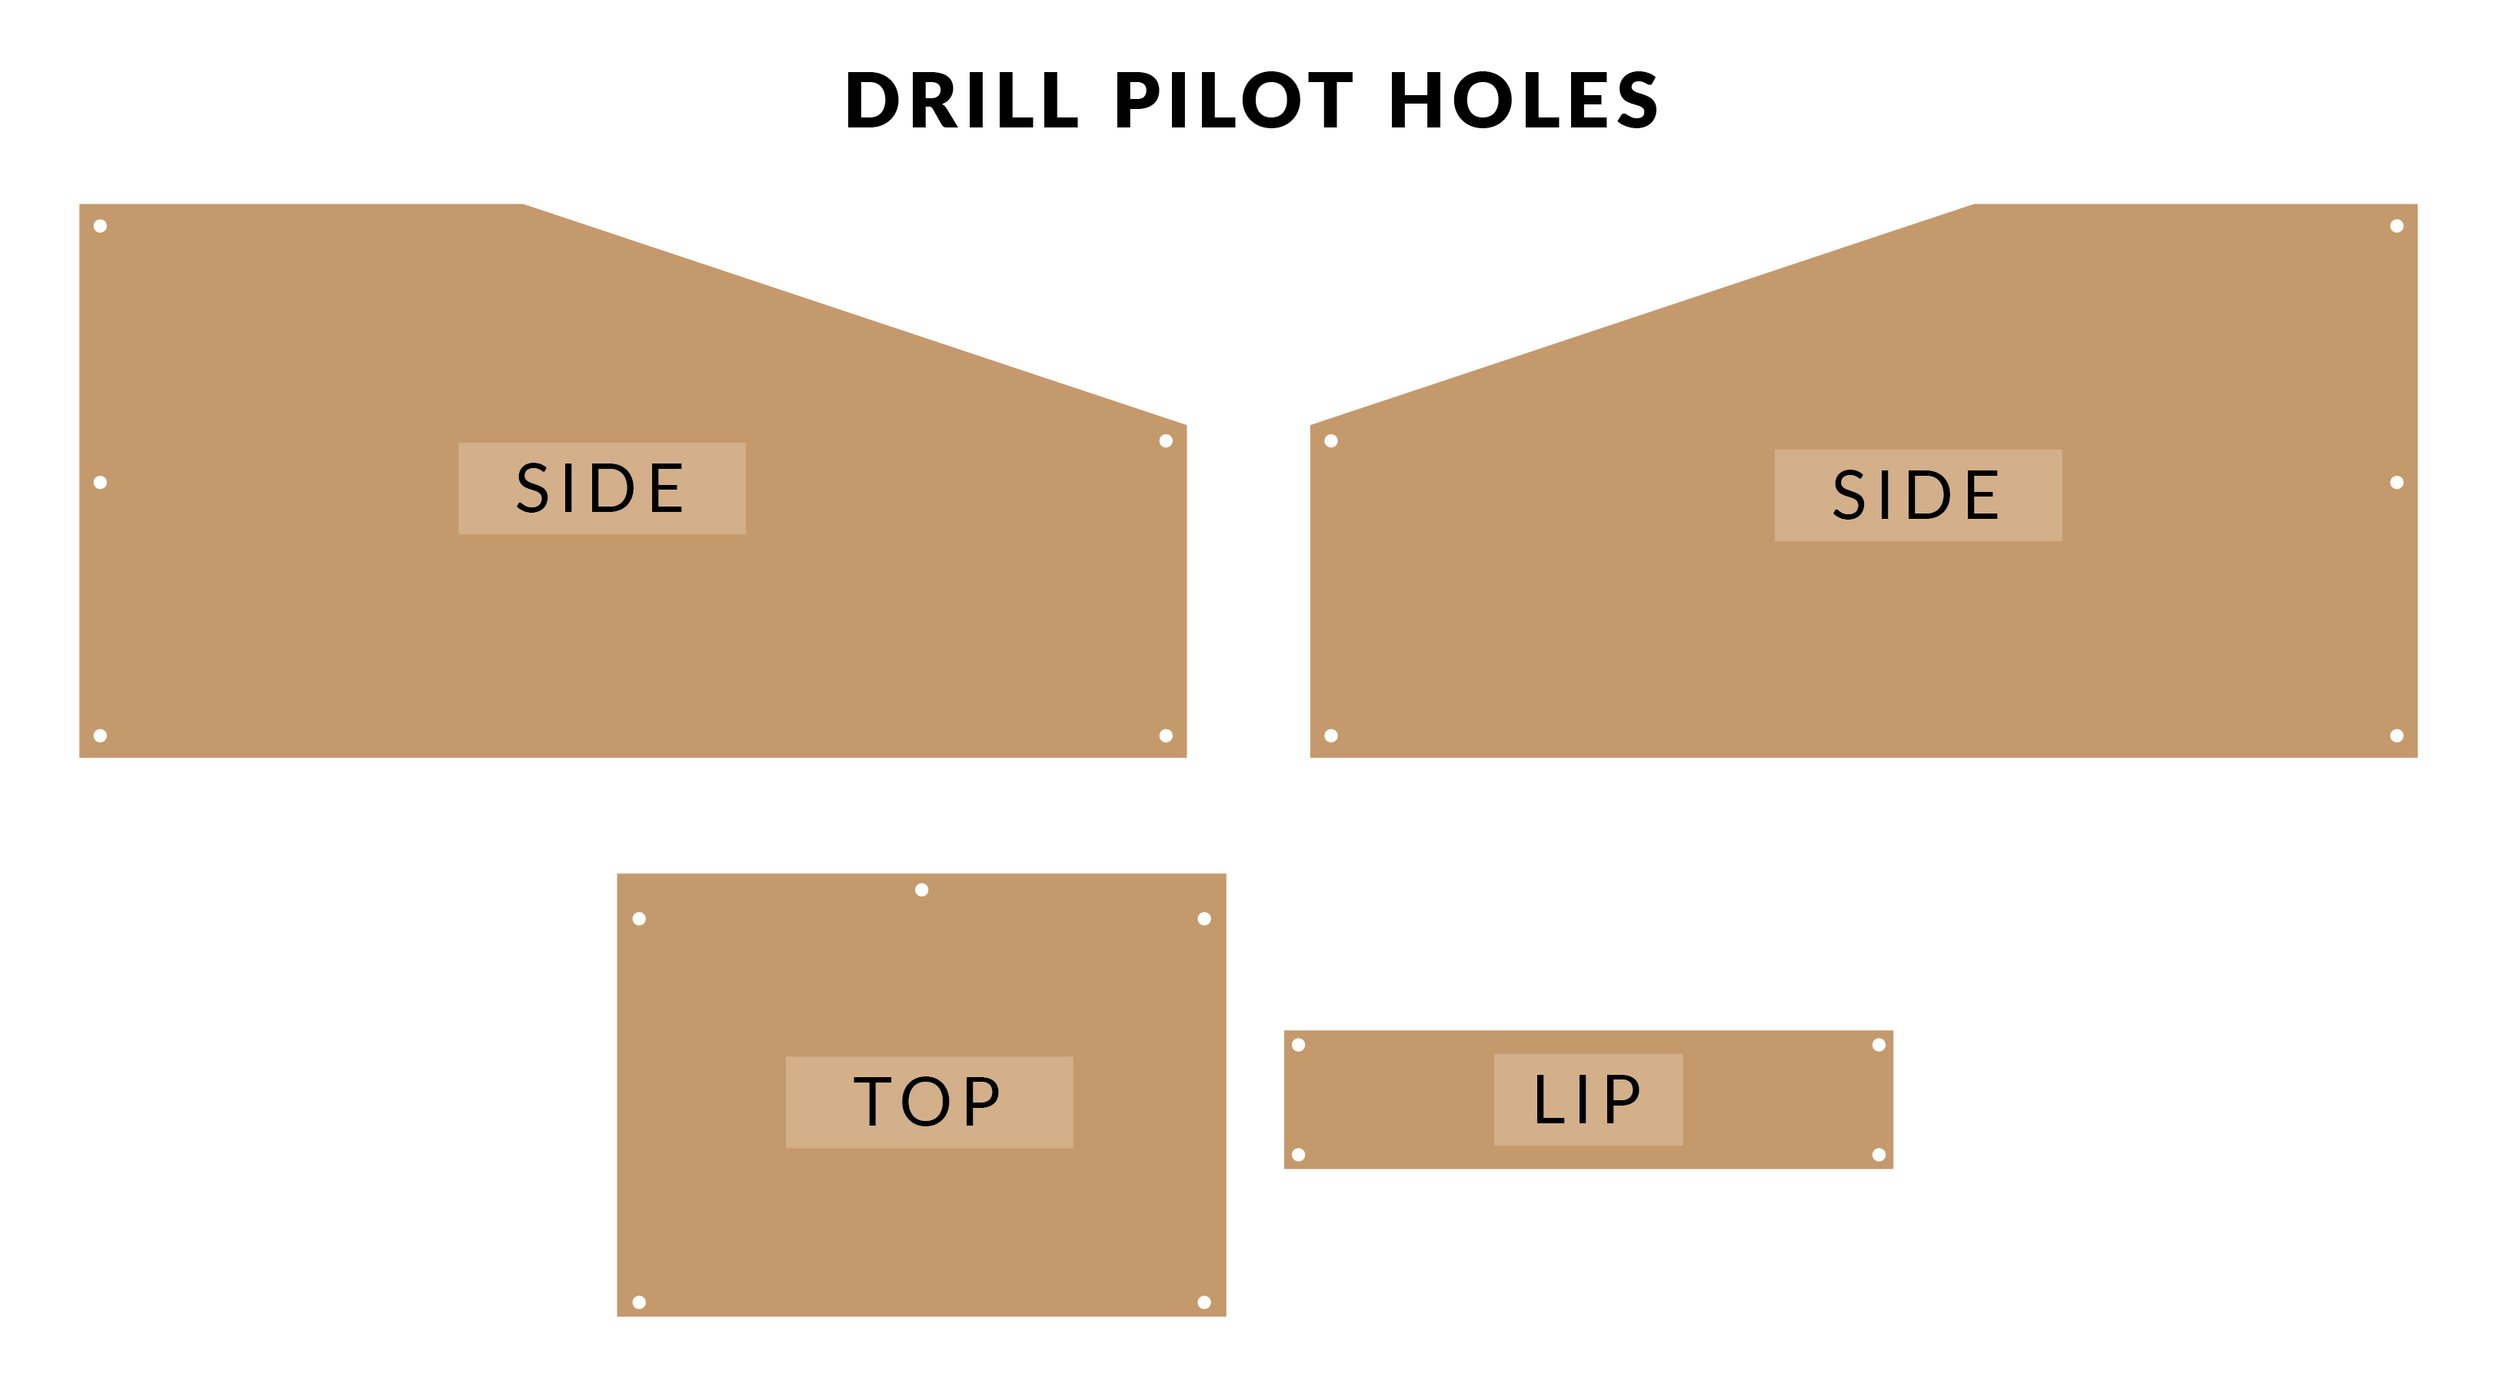
Before assembling any of the pieces together, you will need to drill pilot holes in both of your side pieces, top piece, and lip. Pilot holes are an important step whenever you are working with thinner wood, as they help the wood not to crack when driving screws through them.
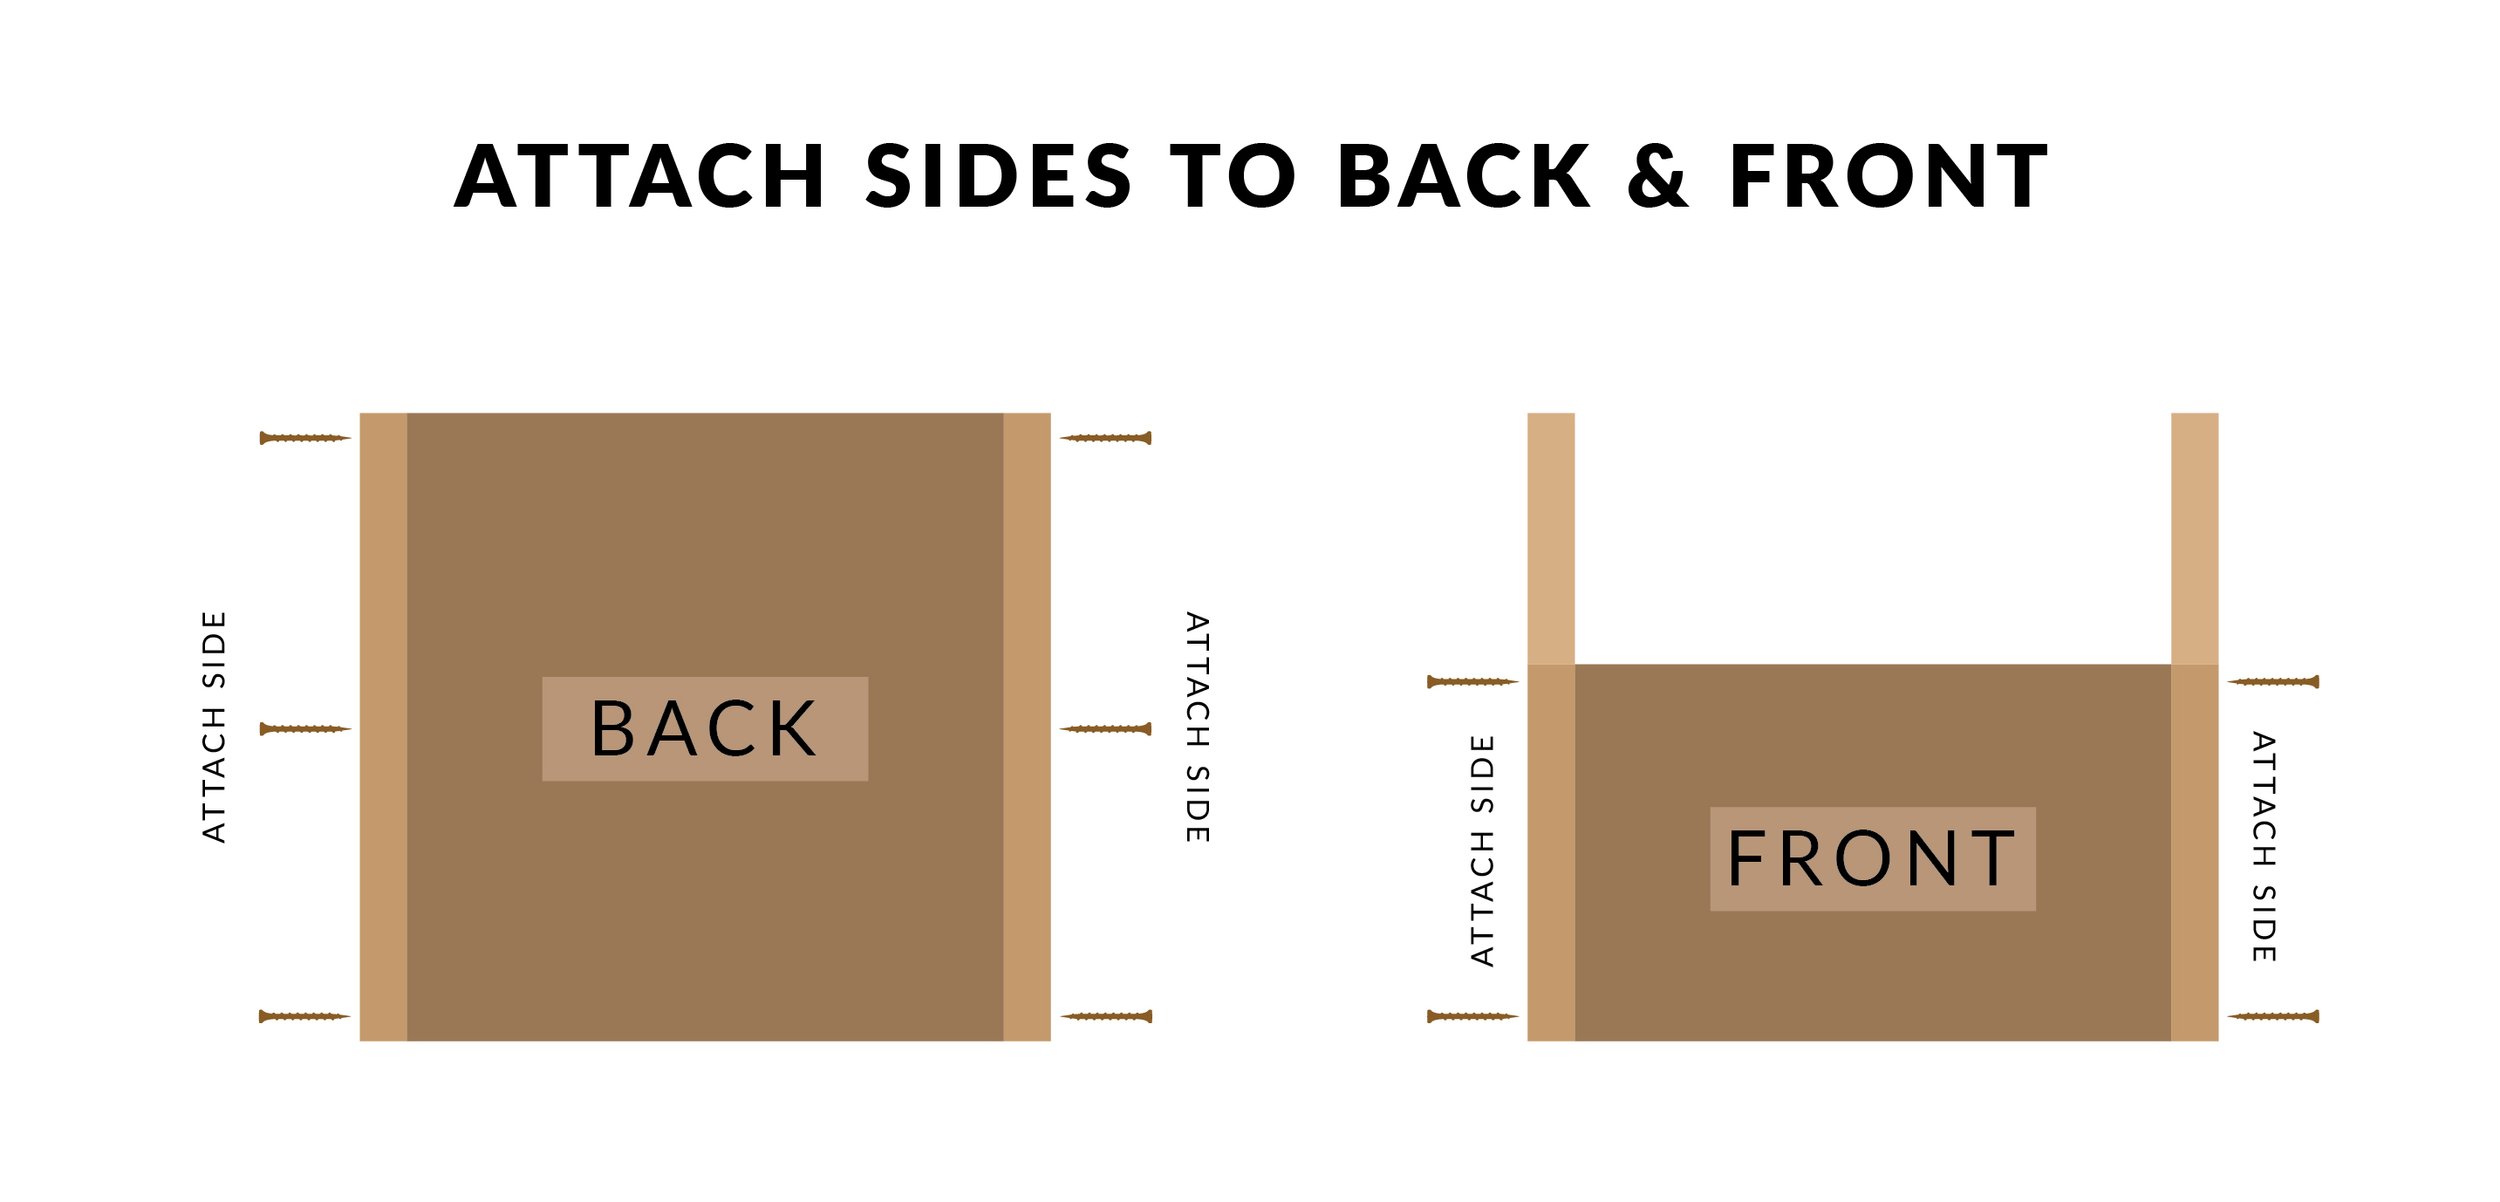
Using the pilot holes you drilled on the side pieces, attach the sides to both the back and the front pieces.
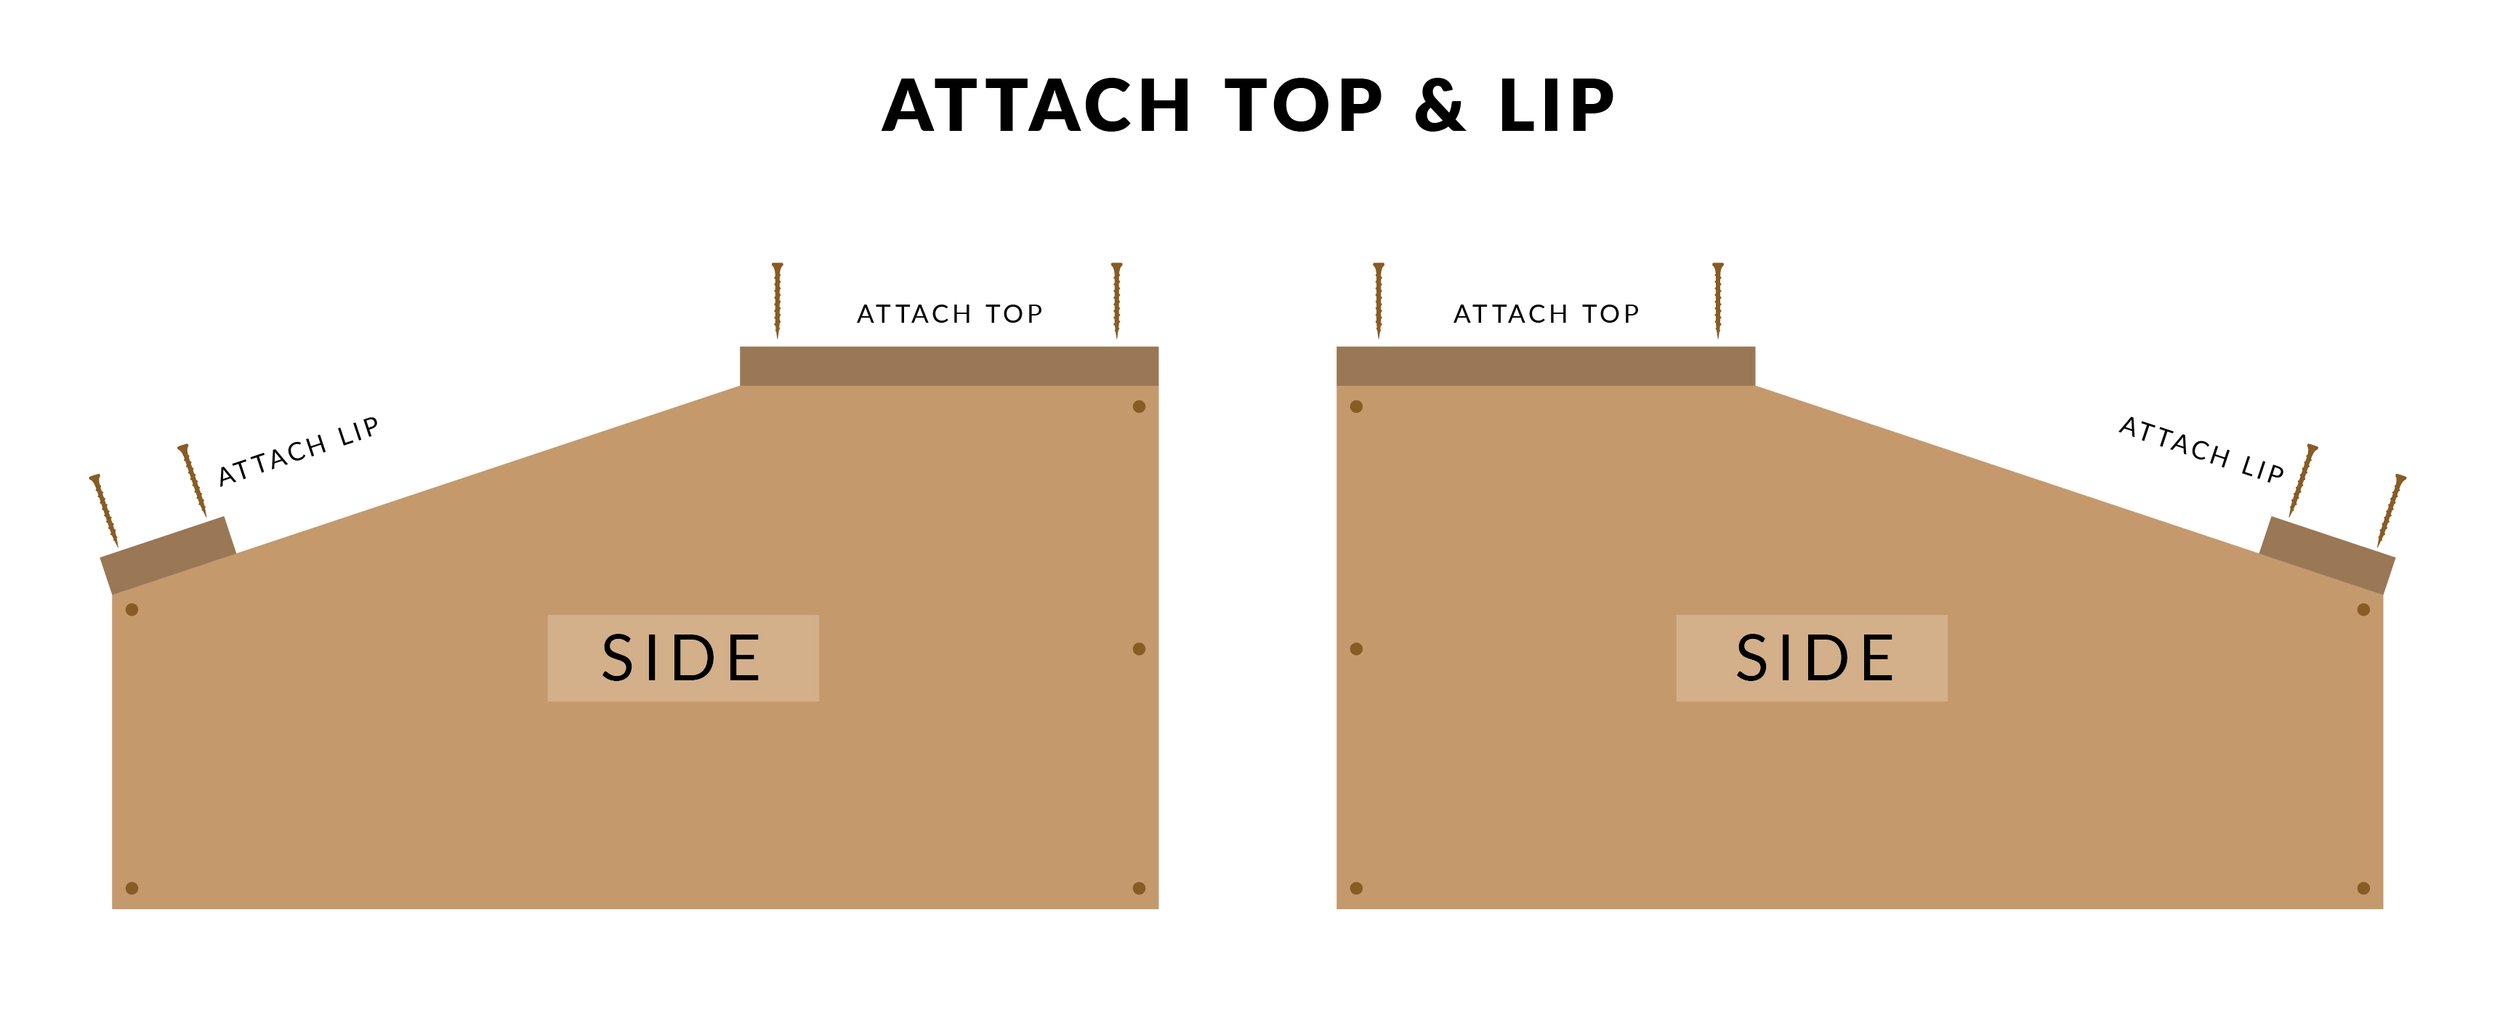
Once the side pieces are attached to both the front and back, you can now attach the top and the lip pieces.
DON’T SKIP THE LIP!
The lip is a very important part of the nest box build. After the mother rabbit nurses her kits, she will jump out of the nest box. In some circumstances, a kit will still be attached to one of her teats. The lip helps to “scrape” any kits that might still be attached to her. Without the lip, the risk of kits spilling out onto the cage floor is greater. Kits on the cage floor often chill and do not make it.

After all wood pieces are assembled, the last step is to attach your 1/4” hardware cloth to the bottom of the box using your lath screws. Lath screws are easy to use and offer the option of being able to remove the hardware cloth and reuse it on future nest boxes, should the wood ever need replaced.


Congratulations!
Your nest box is complete and should look like this. I hope your box sees many successful litters of kits :)


I live in north-central Indiana in the country with my husband, our two dogs, and a lot of animals :) I love to craft and DIY and I’m obsessed with learning new things. I am driven by coffee and my love for animals. Learn more…